
 +44 20 3695 6722
 Sign in
How to set up traffic anomaly detection and response?
The ML-detections section is designed for automatic real-time detection of anomalies in HTTPS traffic using machine learning models and applying the specified protection rules to them.
The system logically groups anomalies into attacks, each of which has its own unique identifier for tracking in the Attack History section. You can manage both individual anomalies and the attacks defined based on them.
While anomalies persist, the attack in the Attack History will have the status “Active”.
An anomaly is a single trigger of a detector for a specific object (IP, URL, or TLS fingerprint).
An attack is a logical grouping of multiple anomalies that share a common identifier.
How to enable ML-detections?
The ML-detections settings are located in the Anti-bot section of your personal account.
To configure it, click on the name of your product in the My Products section. If you have only one protected object, the relevant page will open immediately. If you have several, find the required object on the page that opens and select it by clicking on the row with the miniature graph. In the left menu, select Antibot.
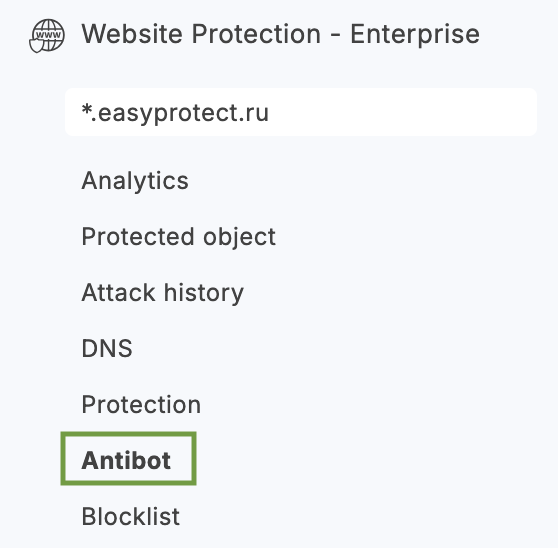
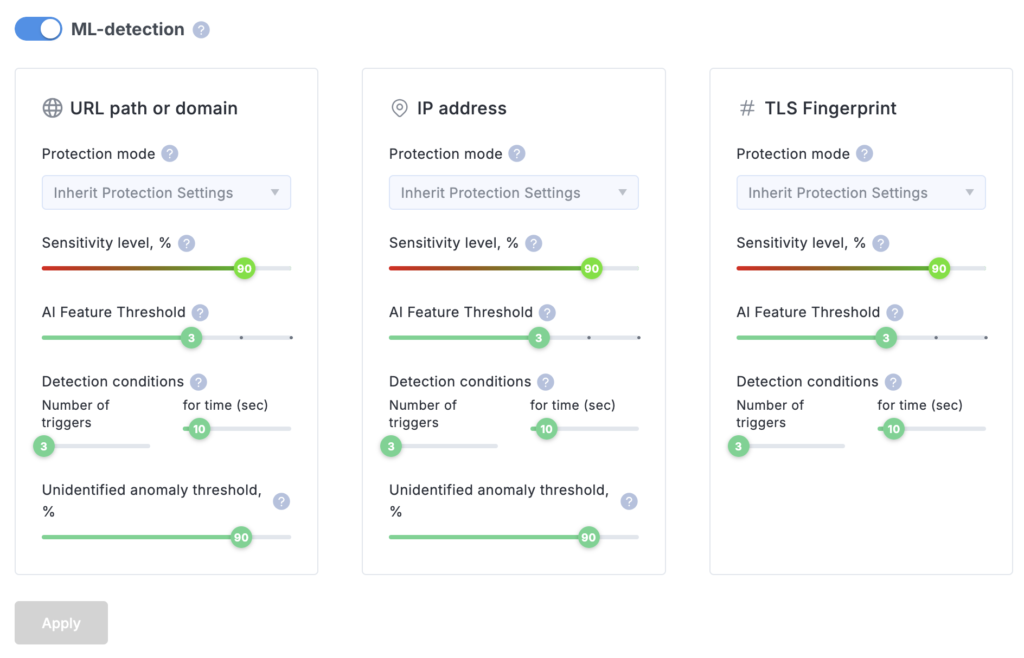
Set the ML-detection toggle to the active position.
Monitoring anomalies
At the top of the section, visual traffic monitoring tools are provided.
Graph
Displays the intensity of requests per second (RPS).
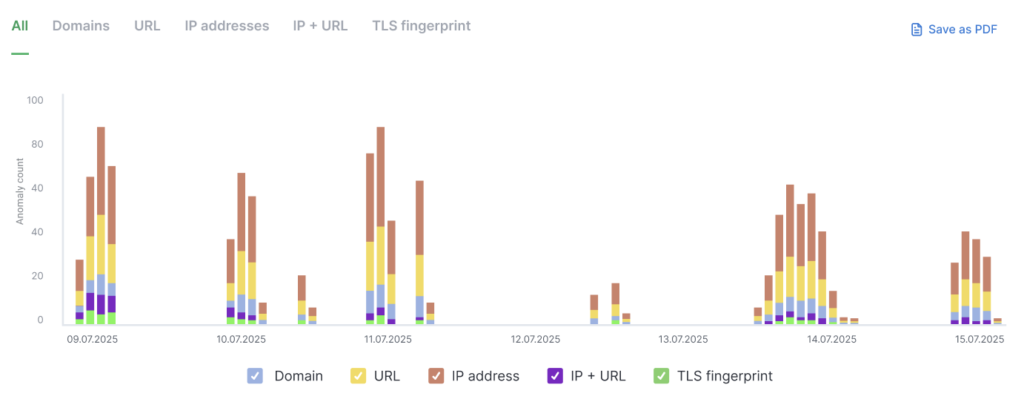
Using the tabs (Domains, URL, IP addresses, IP+URL, TLS fingerprint) and the checkboxes below the graph, you can refine the display of anomalies for specific objects.
The table provides a list of all recorded incidents.
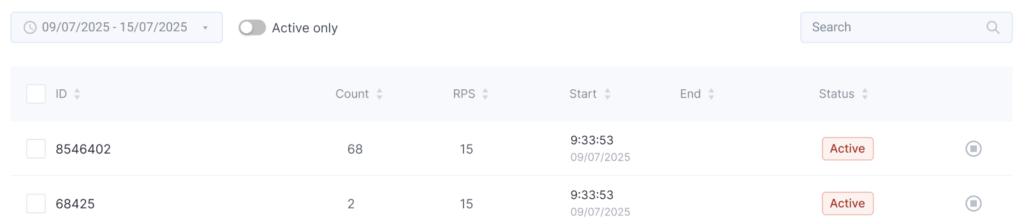
- ID: Unique attack number.
- Count / RPS: The number of anomalies within the attack and the associated load.
- Start / End: Time frame of the incident.
- Status: Indicates whether the attack is Active or Completed.
Click on a row in the table to view detailed information, as well as a list of all affected objects (including specific URLs or IPs).
On the graph describing a single anomaly, you can view two lines simultaneously: Total traffic and Anomalous RPS.
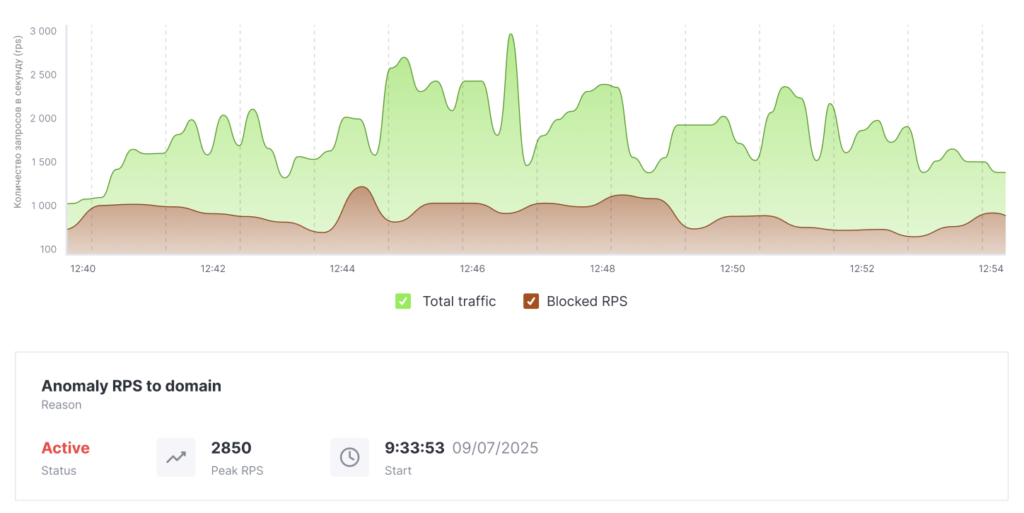
Below the graph, a table of objects affected by the anomaly is displayed.
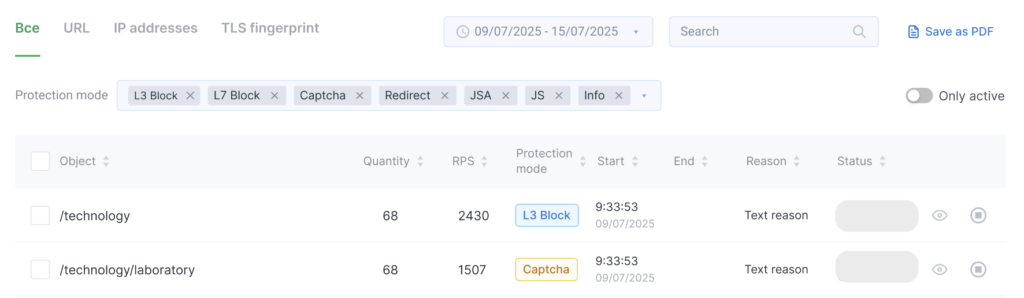
You can add some of them to exceptions if necessary — click on the “stop” icon on the right side of the row. To obtain detailed information on each object, click on the corresponding row.
Configuring protection parameters
Below the analytics tools is a control block for different detection directions: URL or domain, IP address, and TLS Fingerprint.
Protection modes
For each block, you can choose one of the response methods.
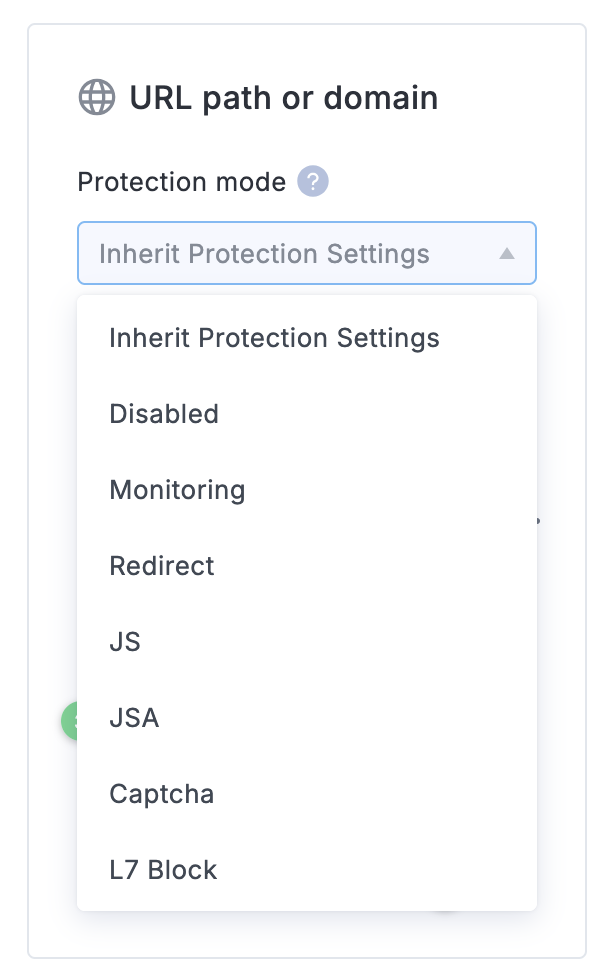
| Method | How It Works |
| Inherit Protection Settings | Applies the strictest of the filtering modes selected in your settings (the Max defense parameter — you can check it on the Protection tab, under Advanced settings, in the L7 sensor setting column). |
| Disabled | Ignores traffic: no filtering is applied and no anomaly alerts are sent. |
| Monitoring | Reports traffic anomalies only, without applying any mitigation. |
| Redirect | Issues an additional redirect to the requested location for visitor requests. The system verifies whether the browser correctly handles standard HTTP redirects and cookies, which helps tell real browsers apart from automated scripts. |
| JS | Runs a JavaScript challenge in the user’s browser. Its main purpose is to confirm that the request comes from a real browser. The check runs automatically and, in most cases, is invisible to the user. |
| JSA | Runs an advanced JavaScript challenge in the client’s browser. This mode enforces stricter control by validating all request types, including form submissions. |
| Captcha | Requires the user to complete an interactive challenge to confirm the request comes from a human rather than an automated system. |
| L7-block | Blocks the source IP address at the L7 proxy layer. |
| L3-block | Blocks the source IP address at the firewall (L3) level. |
Fine-tuning
To minimize false positives, use the following regulators:
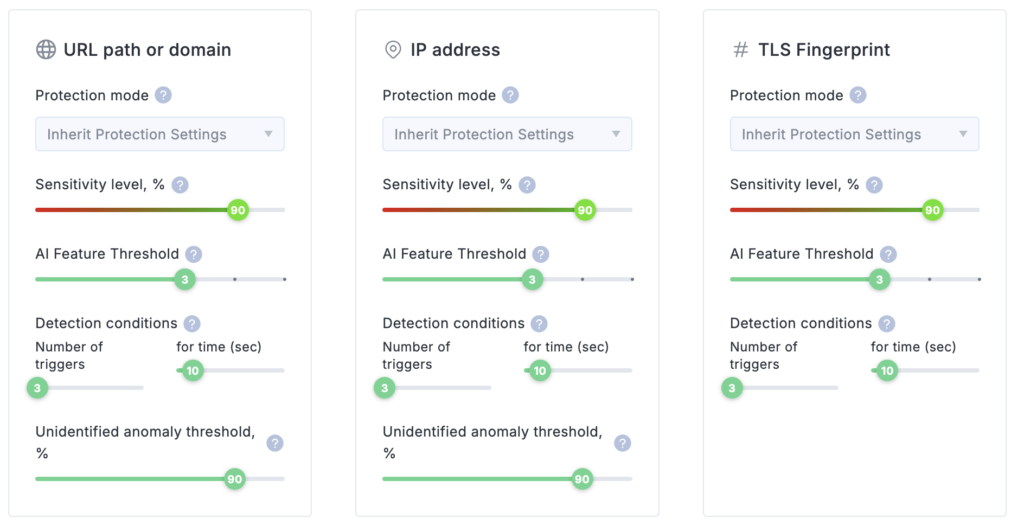
Sensitivity level (%)
The sensitivity level of ML-detections to anomalies:
- Lower values increase detection sensitivity;
- Higher values reduce the number of false positives.
Default value: 90%.
You can set a value as low as 51%, however values below 70% are not recommended.
AI Feature Threshold (%)
The confirmation threshold for anomaly indicators by AI analysis mechanisms:
- Increasing the value makes detection more conservative and reduces the likelihood of false positives;
- Decreasing the value allows more potential anomalies to be detected but may increase the number of erroneous detections.
Default value: 3.
Setting a value of 1 is not recommended. Such a value leads to increased system sensitivity and a higher probability of false positives.
Number of triggers / for time (sec)
This parameter is designed to filter out one-off traffic spikes not associated with an attack.
It specifies the minimum number of anomalies and the time frame within which they can occur. This mechanism helps ignore short-term load spikes from normal user activity.
Default value: 3 triggers per 10 seconds.
This parameter helps to ignore situations where a new user visits the site and temporarily downloads a large volume of static content.
Unidentified anomaly threshold (%)
The share (%) of anomalous traffic that could not be identified more precisely—for example, by IP, TLS fingerprint, or URL.
If the share is:
- Below the specified threshold—only point protection (filtering) is applied to individual traffic types (e.g., by IP, URL, or TLS fingerprint);
- Above the threshold—protection is applied to the entire domain (or the attacked URL).
Thus, the lower the value, the more granular and targeted the protection applied.
Default value: 90%.
The optimal value for most situations is 85-90%.
Profiles
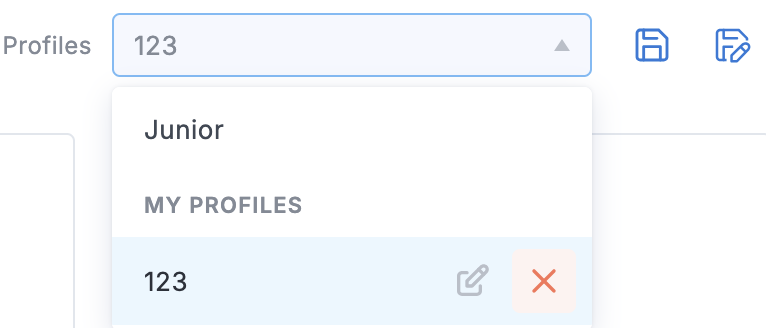
You can save your current settings under any custom name and reuse them later — apply, modify, or remove them as needed. The default system configuration is stored as a read-only template, allowing you to restore factory defaults at any time.
Exceptions
If you know that certain traffic is legitimate (e.g., API requests), add it to the Exceptions.
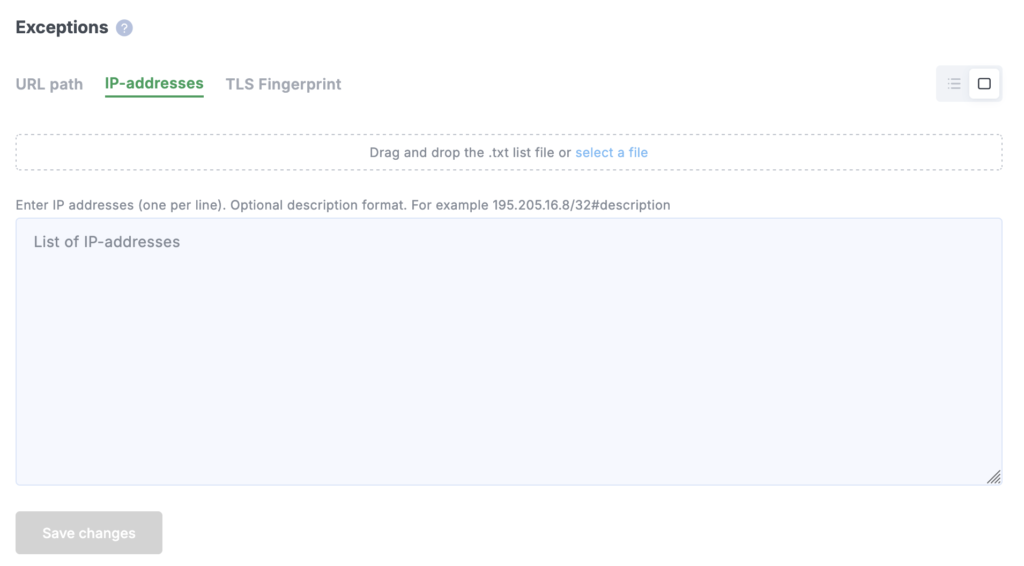
Lists for URL path, IP addresses, and TLS Fingerprint values are supported. Objects can be entered manually or uploaded via a .txt file. After saving, anomalies for these objects will no longer be recorded.
