


Log in to your Client Portal. Go to the Dashboard tab.
In the left-hand menu, select Report scheduler.
A section with a table will open, where each entry represents a separate scheduled report.
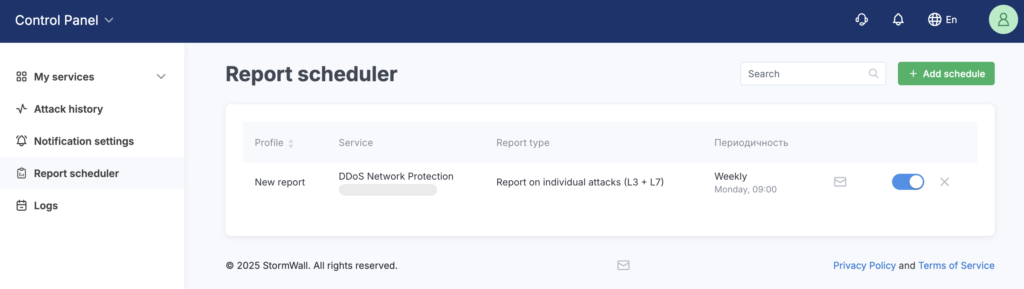
To create a new schedule that will automatically send a report to your email, click the Add schedule button.
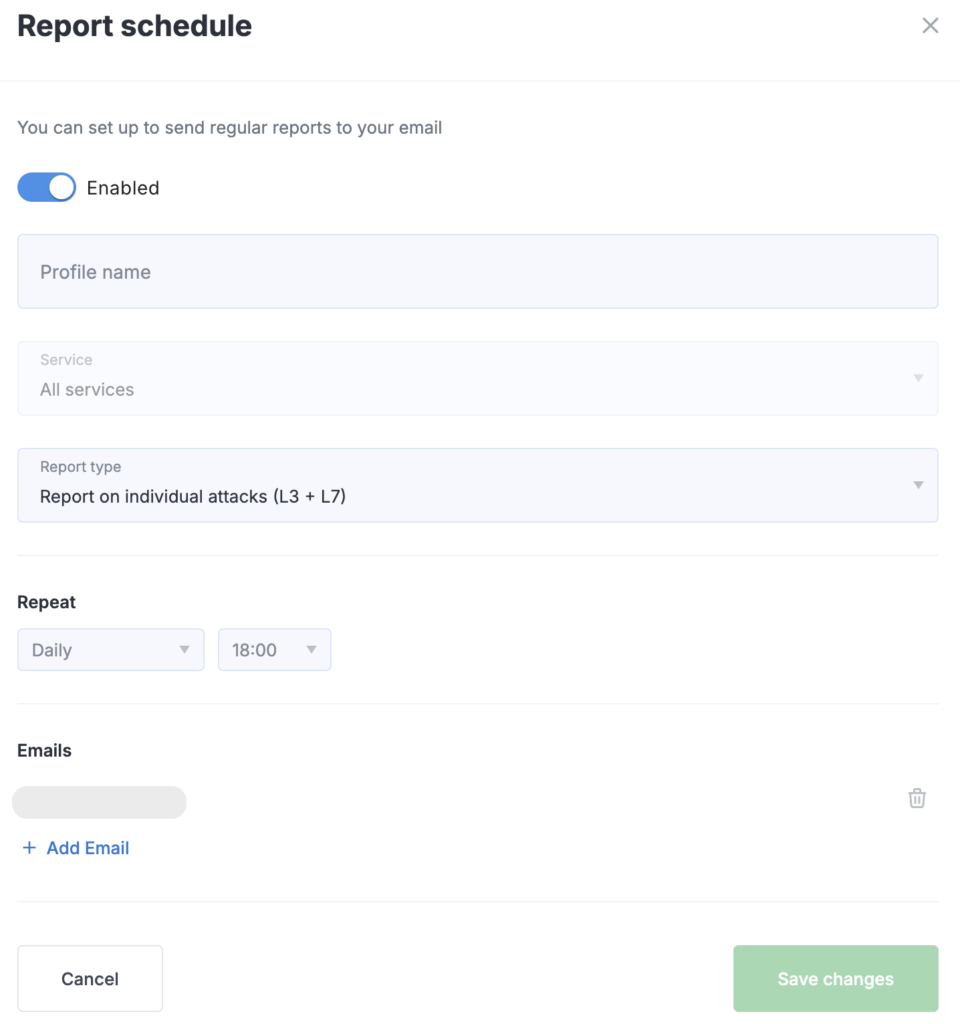
Fill out the form:
Profile name: Give your report a clear and descriptive name, for example, “Weekly Summary for Main Website” or “Daily L7 Attack Report.”
Service: Select the required connected service from the drop-down list for which the data should be provided.
Report type: Various report formats are available for selection:
- Summary Attack Report — an overview and links to detailed information about each attack in the Client Portal.
- Detailed Attack Report (L3+L7) — detailed breakdown of all types of incidents.
- Detailed Attack Report (L3) — focused on network-level attacks.
- Detailed Attack Report (L7) — focused on application-level attacks.
Frequency: Configure how often you want to receive the report. For example, select Weekly, set the day of the week to Monday, and the sending Time to 09:00.
List of email addresses: Specify the addresses to which the generated reports should be sent. This is convenient for team use when the data needs to be distributed to multiple specialists simultaneously.
When the Quarterly period is selected, the chosen day number corresponds to the day within the quarter when the report will be delivered. For instance, selecting Day 54 means that on every 54th day of the quarter, a report will be generated covering the period “54th day of the previous quarter – 54th day of the current quarter.”
After completing the form, save the new schedule. It will appear in the table, where you can pause the distribution (using the toggle switch on the right side of the table) or delete reports that are no longer needed.