


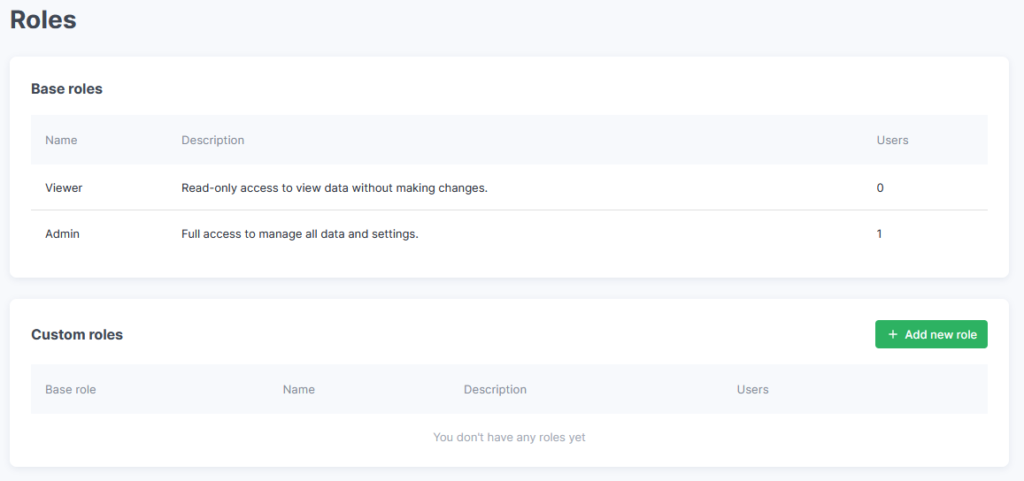
On the Roles page, you can create, edit, or delete additional user roles.
For example, you can create a custom role and assign it only the right to receive notifications.
Creation
New roles are created based on predefined ones. In the default Viewer role, all checkboxes in the VIEW field are preselected, while in the Admin role, all checkboxes in all fields are selected. You can remove or add any settings regardless of the base role name.
To create a new role, click the Add new role button.
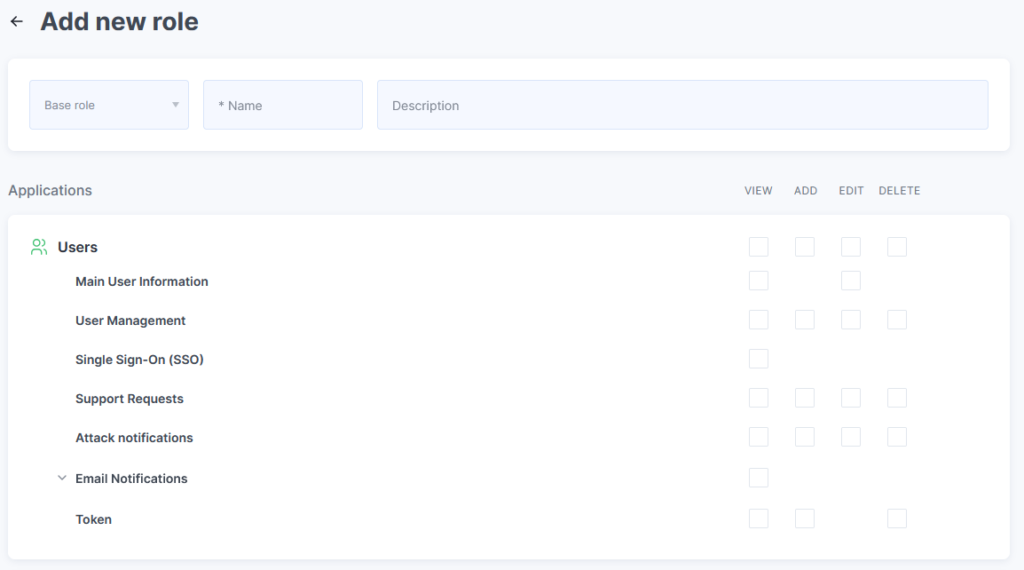
Fill in the required fields in the form:
- Base role
- Name
Optionally, add a description for the role.
Select access levels for the role by checking the following options:
- VIEW
- ADD
- EDIT
- DELETE
After completing the configuration, click the Create button (under forms).
You can assign different access permissions for different domains.
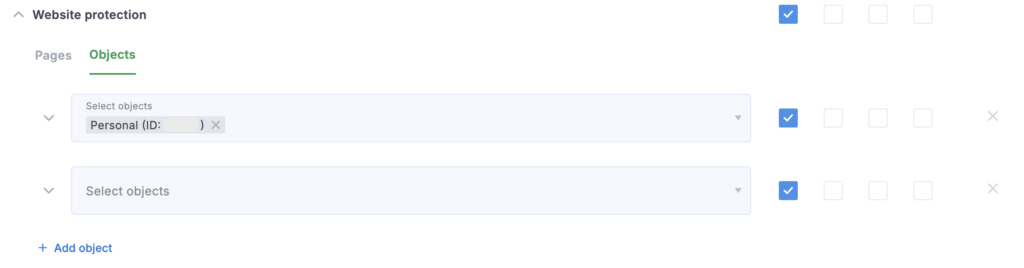
If you have restricted access to services and/or domains for certain users, then when connecting a new service (or adding a domain), you must specify the access level for the newly added resources.
When assigning permissions, note that you can manage an entire section independently of its subsections.
For example, in this case, the user is allowed to view all items in the Users section.
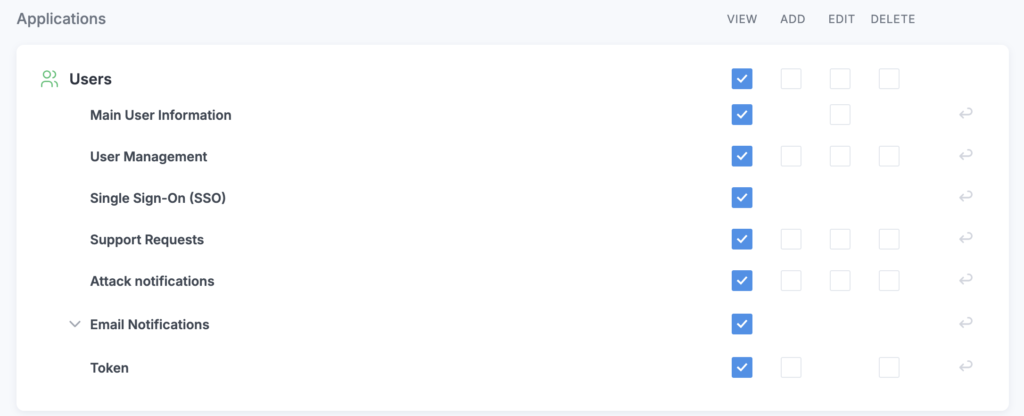
If you clear the checkbox in the row with the section name, the user will not have access to any of its subsections.
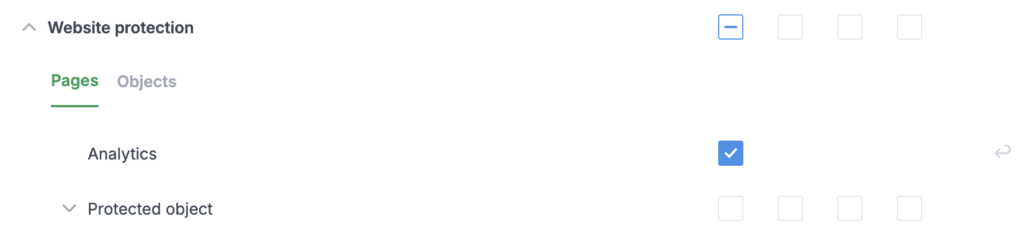
If you deny access to one of the subsections (for example, Analytics), the checkbox in the row with the section name (for example, Dashboard) will change color. This indicates that the user will have general access to the section, but not to all of its subsections.
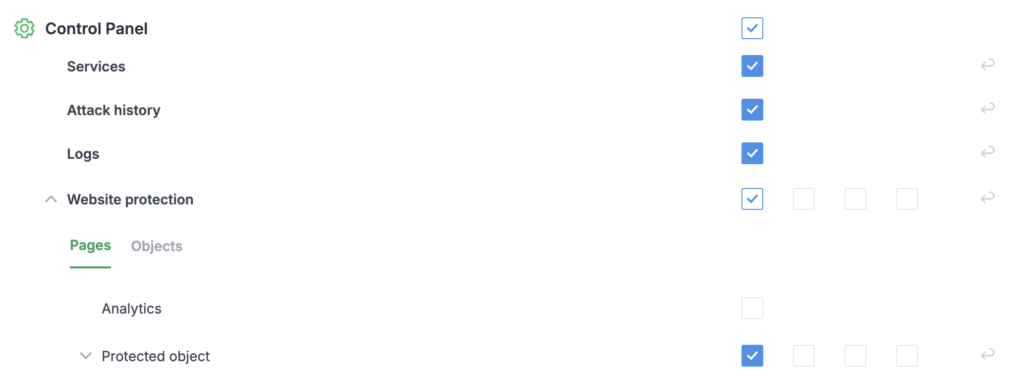
If access to a section is restricted but access to one of its subsections is allowed, the checkbox in the section row (for example, Website protection) will be replaced with a “minus” sign. The permission set at the higher level takes precedence over those set at lower levels.
For a user to be able to manage services in their personal account (for example, submit disconnection requests), all checkboxes in the Billing section must be selected, including the checkboxes in the DELETE column. This option is only available for the Admin role and for custom roles created based on it.
Editing
To modify the parameters of a role, click the edit icon in its row.
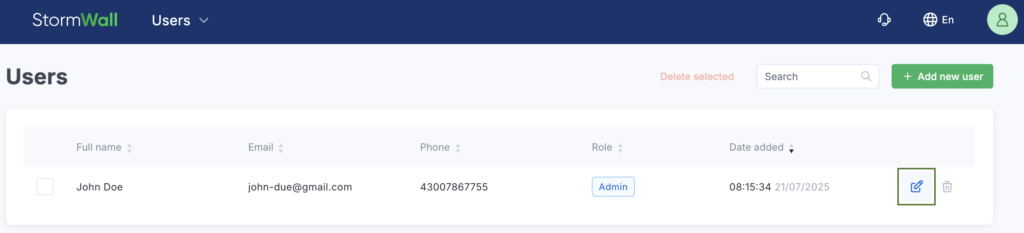
A form for editing the data will open.
After making changes, click the Save Changes button to save the data.
Deletion
To delete a role, click the delete icon in its row.
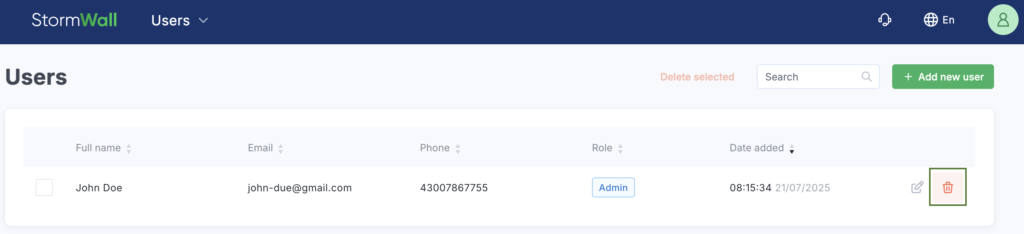
Confirm the deletion in the dialog box by clicking the Yes, delete button.